
Creating PDF Report

Configuration Setup
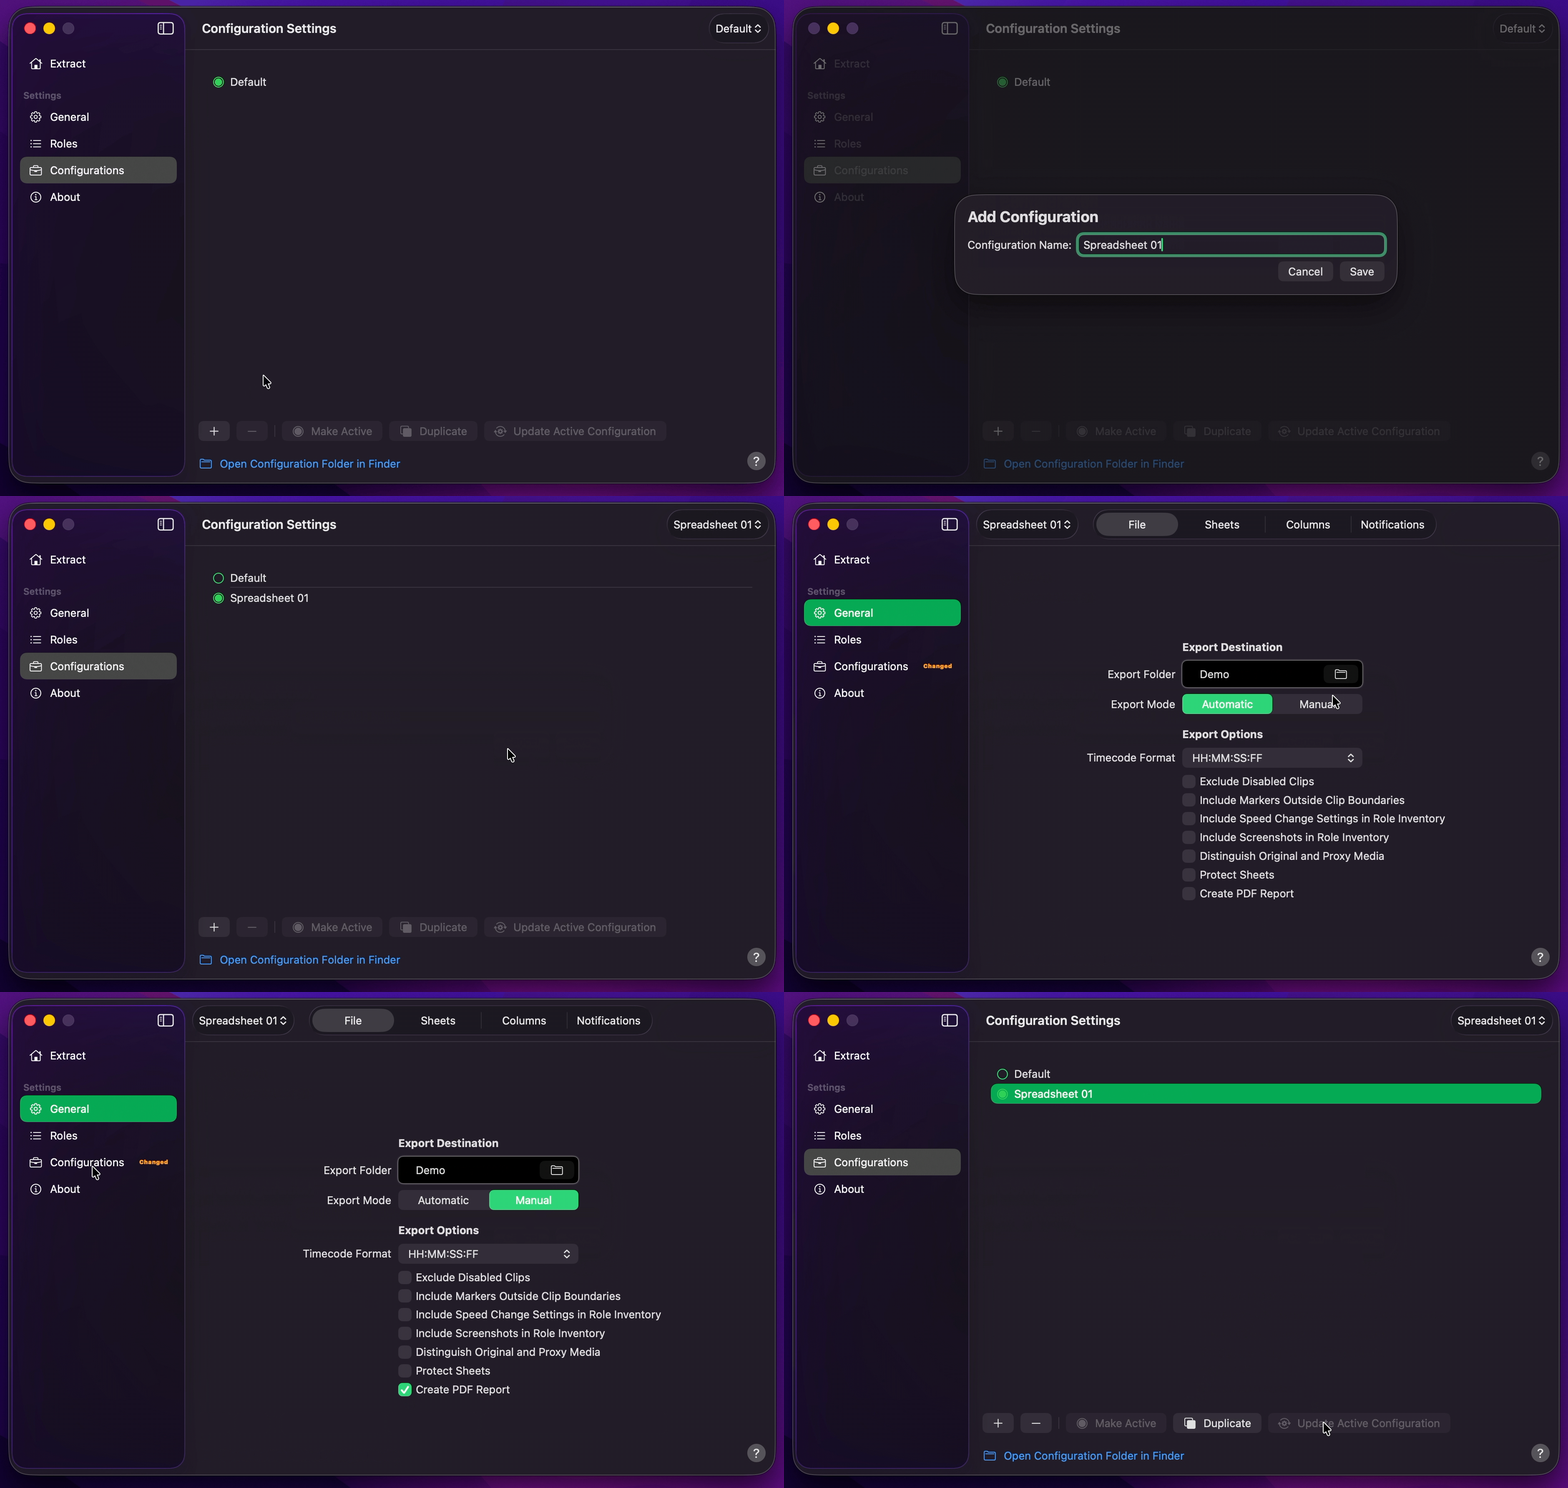
- Create Your Configuration.
- Select your desired Export Destination by clicking on the Folder Icon.
- Select
AutomaticorManualExport Mode.AutomaticDefault begins the export as soon as a project is received. - Enable Create PDF Report under Export Options.
- Optionally, under Sheets, enable the report worksheets you need — or turn on
Full Reportto include every optional sheet. - Optionally, under Columns, enable or disable the columns that appear on role inventory sheets.
- Return to Configurations to Update Active Configuration.
Info
PDF uses the same active Configuration as Excel — there are no separate PDF sheet or column settings. By
Default
, only the Excel workbook is exported; enable Create PDF Report to write a matching .pdf alongside it.
Optional Sheet Selection
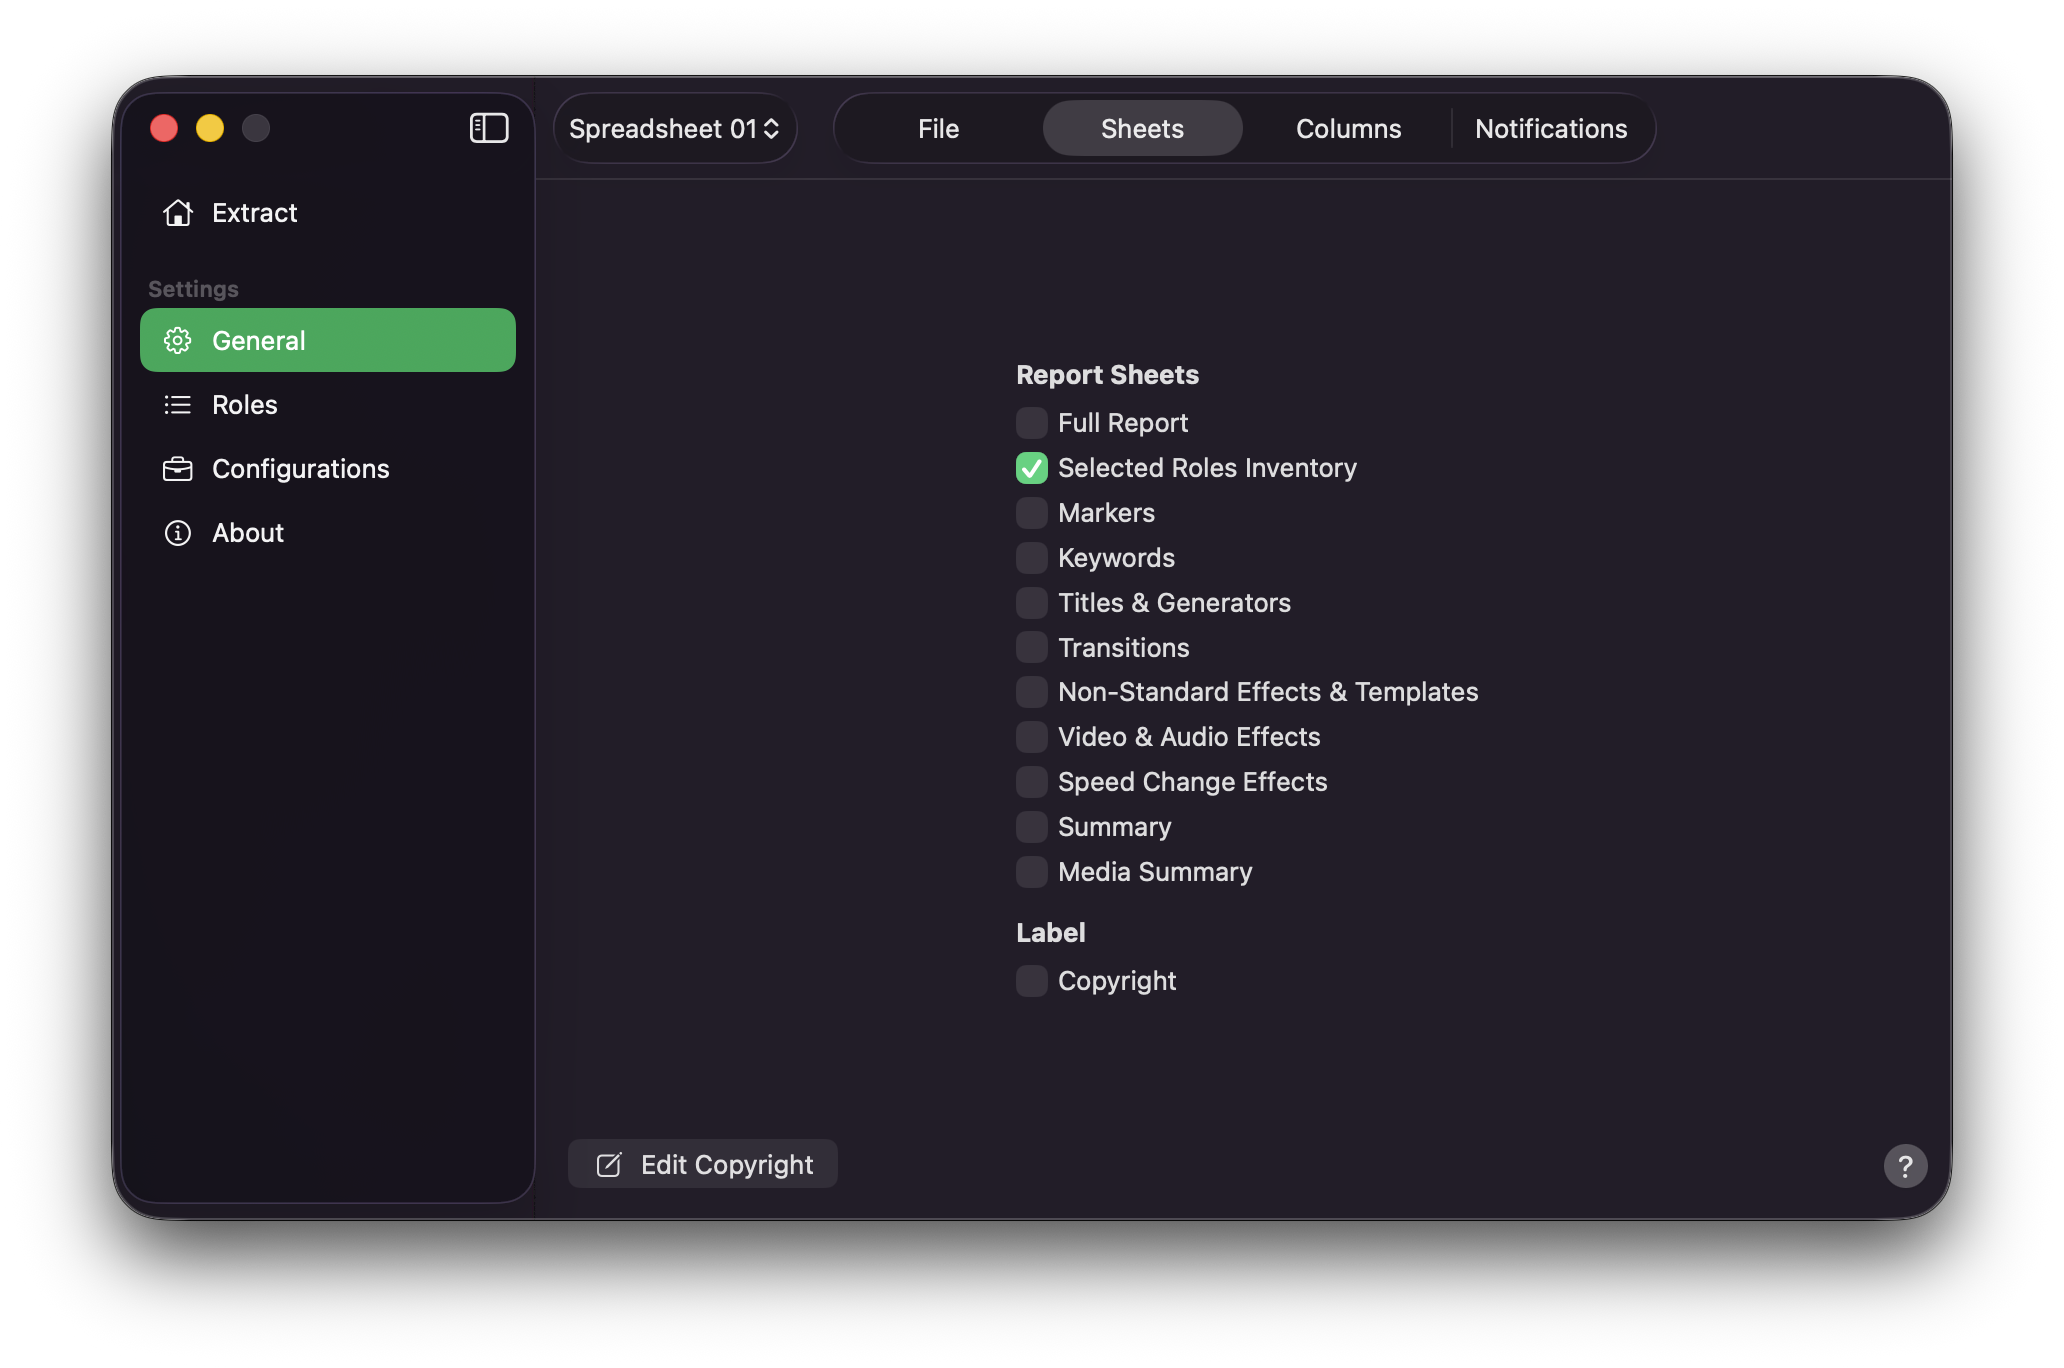
On the Sheets tab, choose which worksheets appear in both the Excel workbook and the PDF report:
- Turn on
Full Reportto enable every optional sheet at once, or - Enable sheets individually — for example
Markers,Keywords,Titles & Generators,Summary, orMedia Summary
A summary of enabled sheets is also shown in the status bar on Extract.
Optional Column Selection
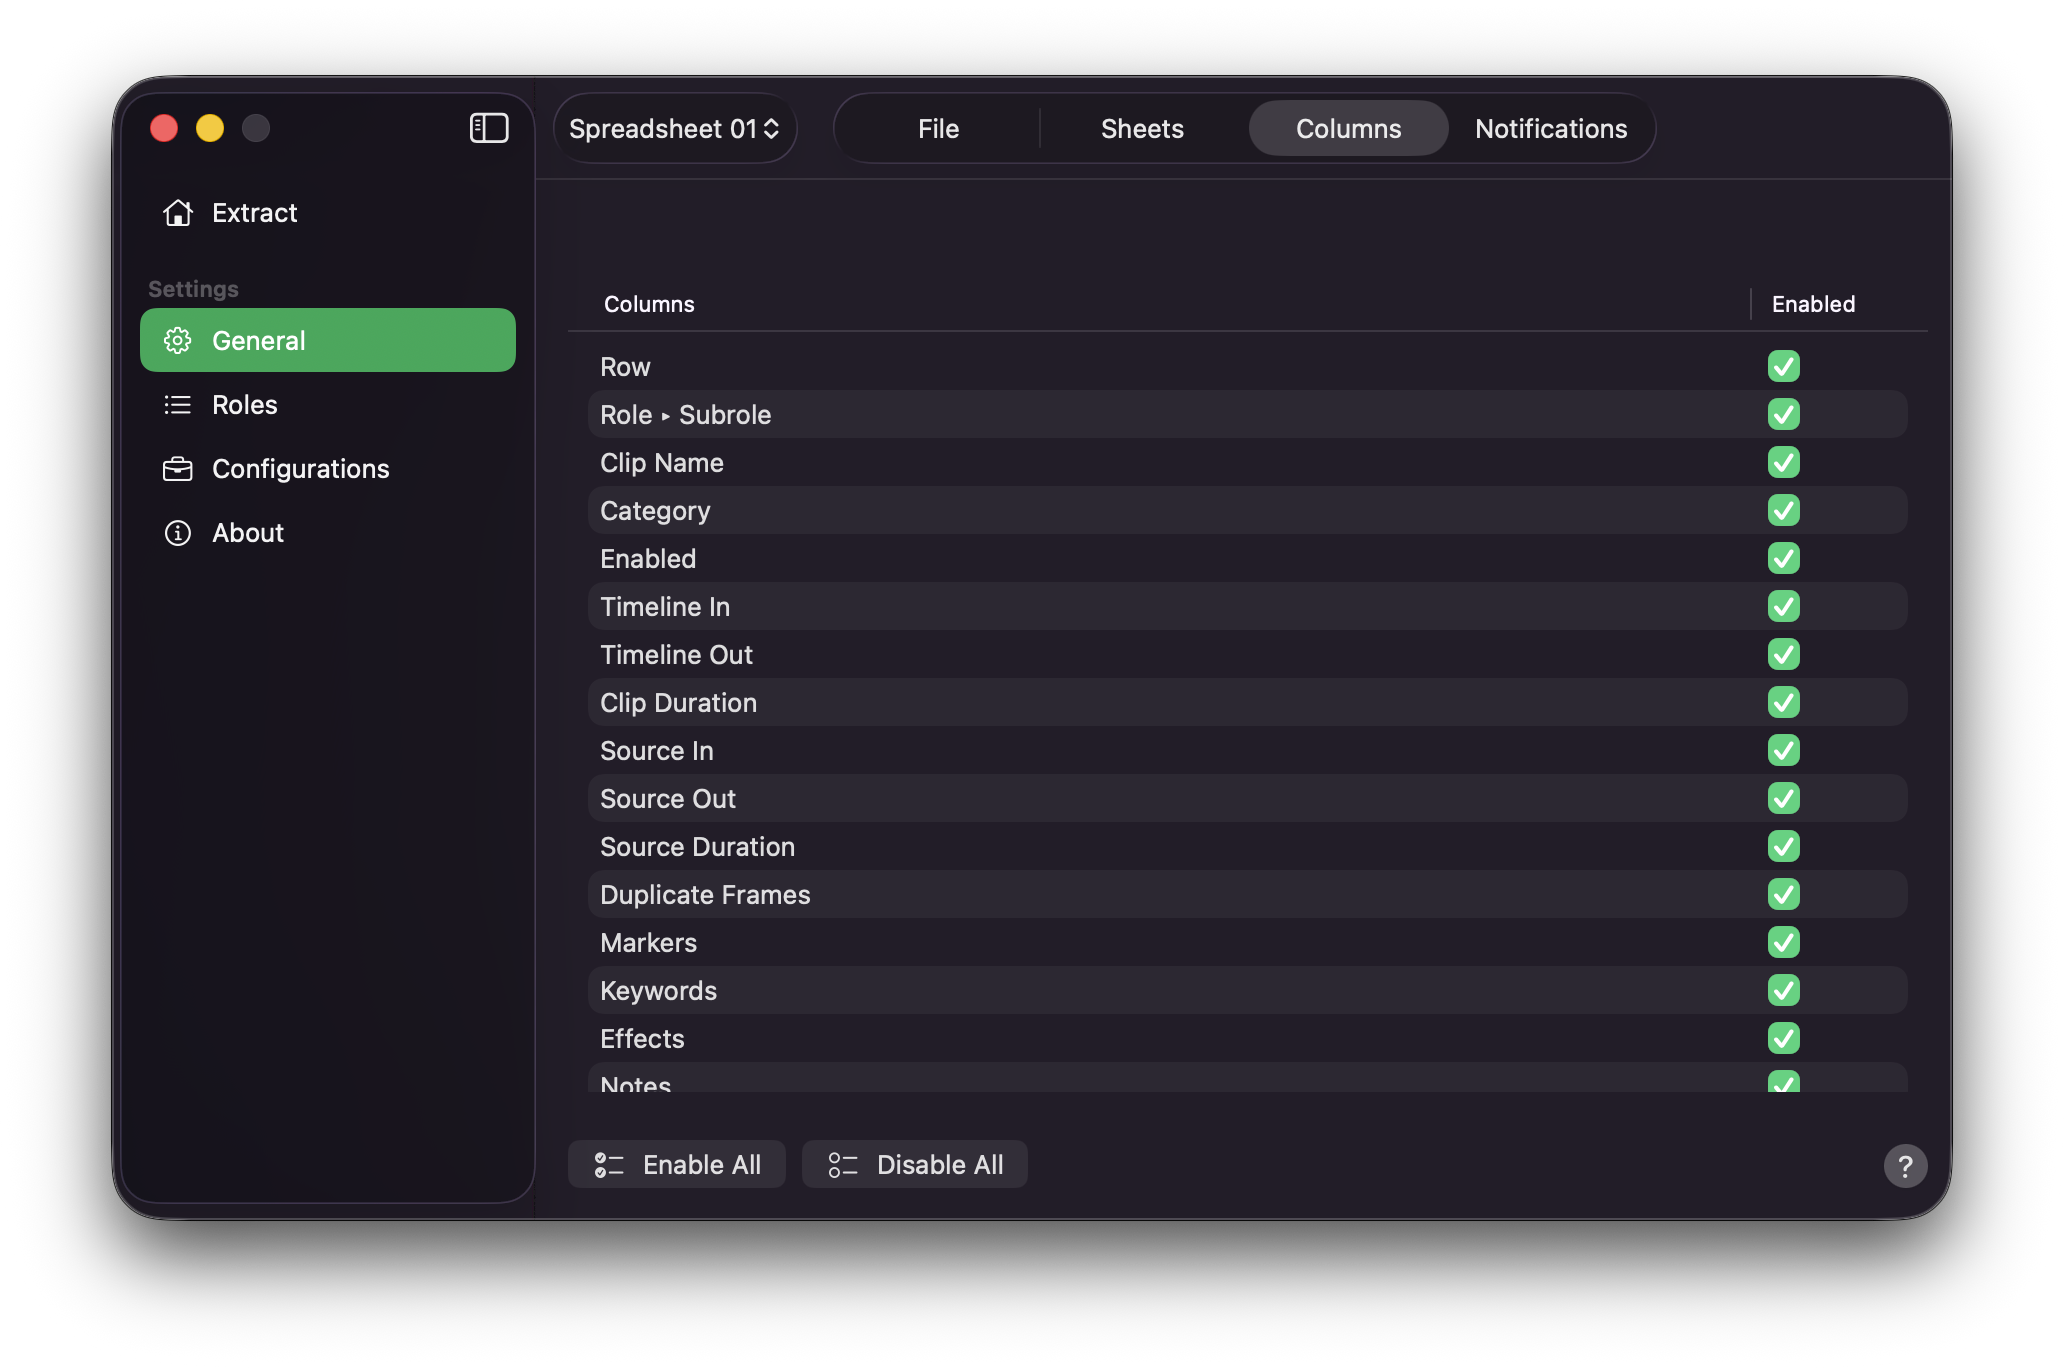
On the Columns tab, use the table to turn individual columns on or off. Disabled columns are omitted from both the Excel and PDF export. Press Enable All or Disable All when you need a quick reset.
Final Cut Pro to PDF Report
- Drag and drop your
.fcpxmlor.fcpxmldfile onto Extract, or drag a timeline / compound clip from Final Cut Pro. - Production Data will begin the export.
- Production Data will create an Excel workbook (
.xlsx) and a PDF report (.pdf) in your Export Destination.
Experimental
PDF export is experimental and optimised for A4 landscape. For the complete dataset and full column control, use the accompanying Excel (.xlsx) workbook.
Warning
On large or complex timelines — especially with Full Report enabled — the PDF can run to a thousand pages, and sometimes several thousand or more. Preview can take a very long time to open, or the file can be impractical to use. Leave Create PDF Report off for those jobs.