# Include Screenshots

## Configuration Setup
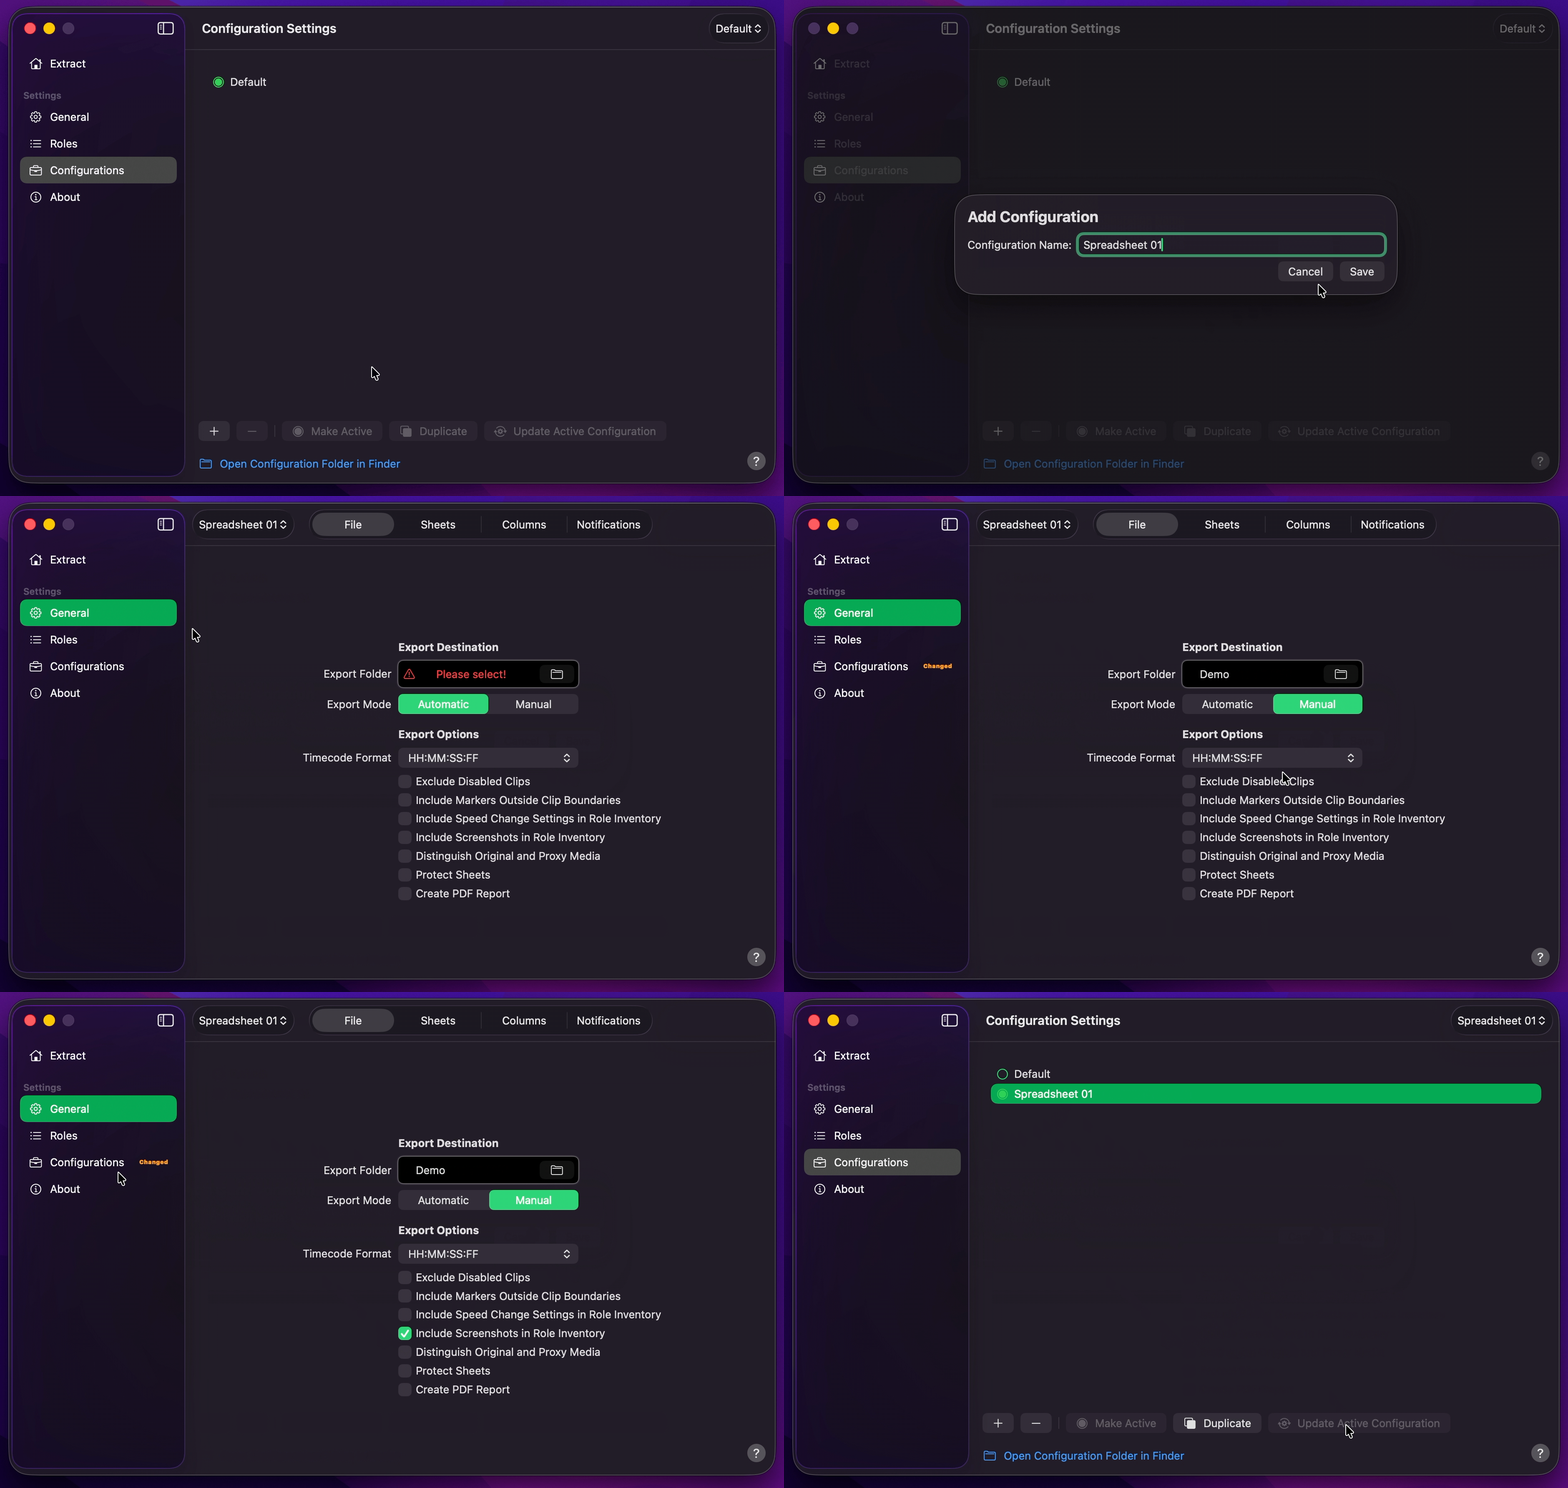
1. [Create Your Configuration](/user-guide/configurations/#add-configuration).
2. Select your desired Export Destination by clicking on the [Folder Icon](/user-guide/general/#export-destination).
3. Select `Automatic` or `Manual` [Export Mode](/user-guide/general/#export-mode). `Automatic` [!badge text="Default"] begins the export as soon as a project is received.
4. Enable [Include Screenshots in Role Inventory](/user-guide/general/#include-screenshots-in-role-inventory) under Export Options.
5. Optionally, under [Sheets](/user-guide/general/#sheets), enable the report worksheets you need — or turn on `Full Report` to include every optional sheet.
6. Optionally, under [Columns](/user-guide/general/#columns), enable or disable the columns that appear on role inventory sheets.
7. Return to Configurations to [Update Active Configuration](/user-guide/configurations/#update-active-configuration).
!!!info Info
By [!badge text="Default"], screenshots are omitted. `Include Screenshots in Role Inventory` applies to the Excel workbook (`.xlsx`) only — the PDF does not include a Screenshot column or embeds. The `Screenshot` column is not listed under Columns.
!!!
### Optional Sheet Selection
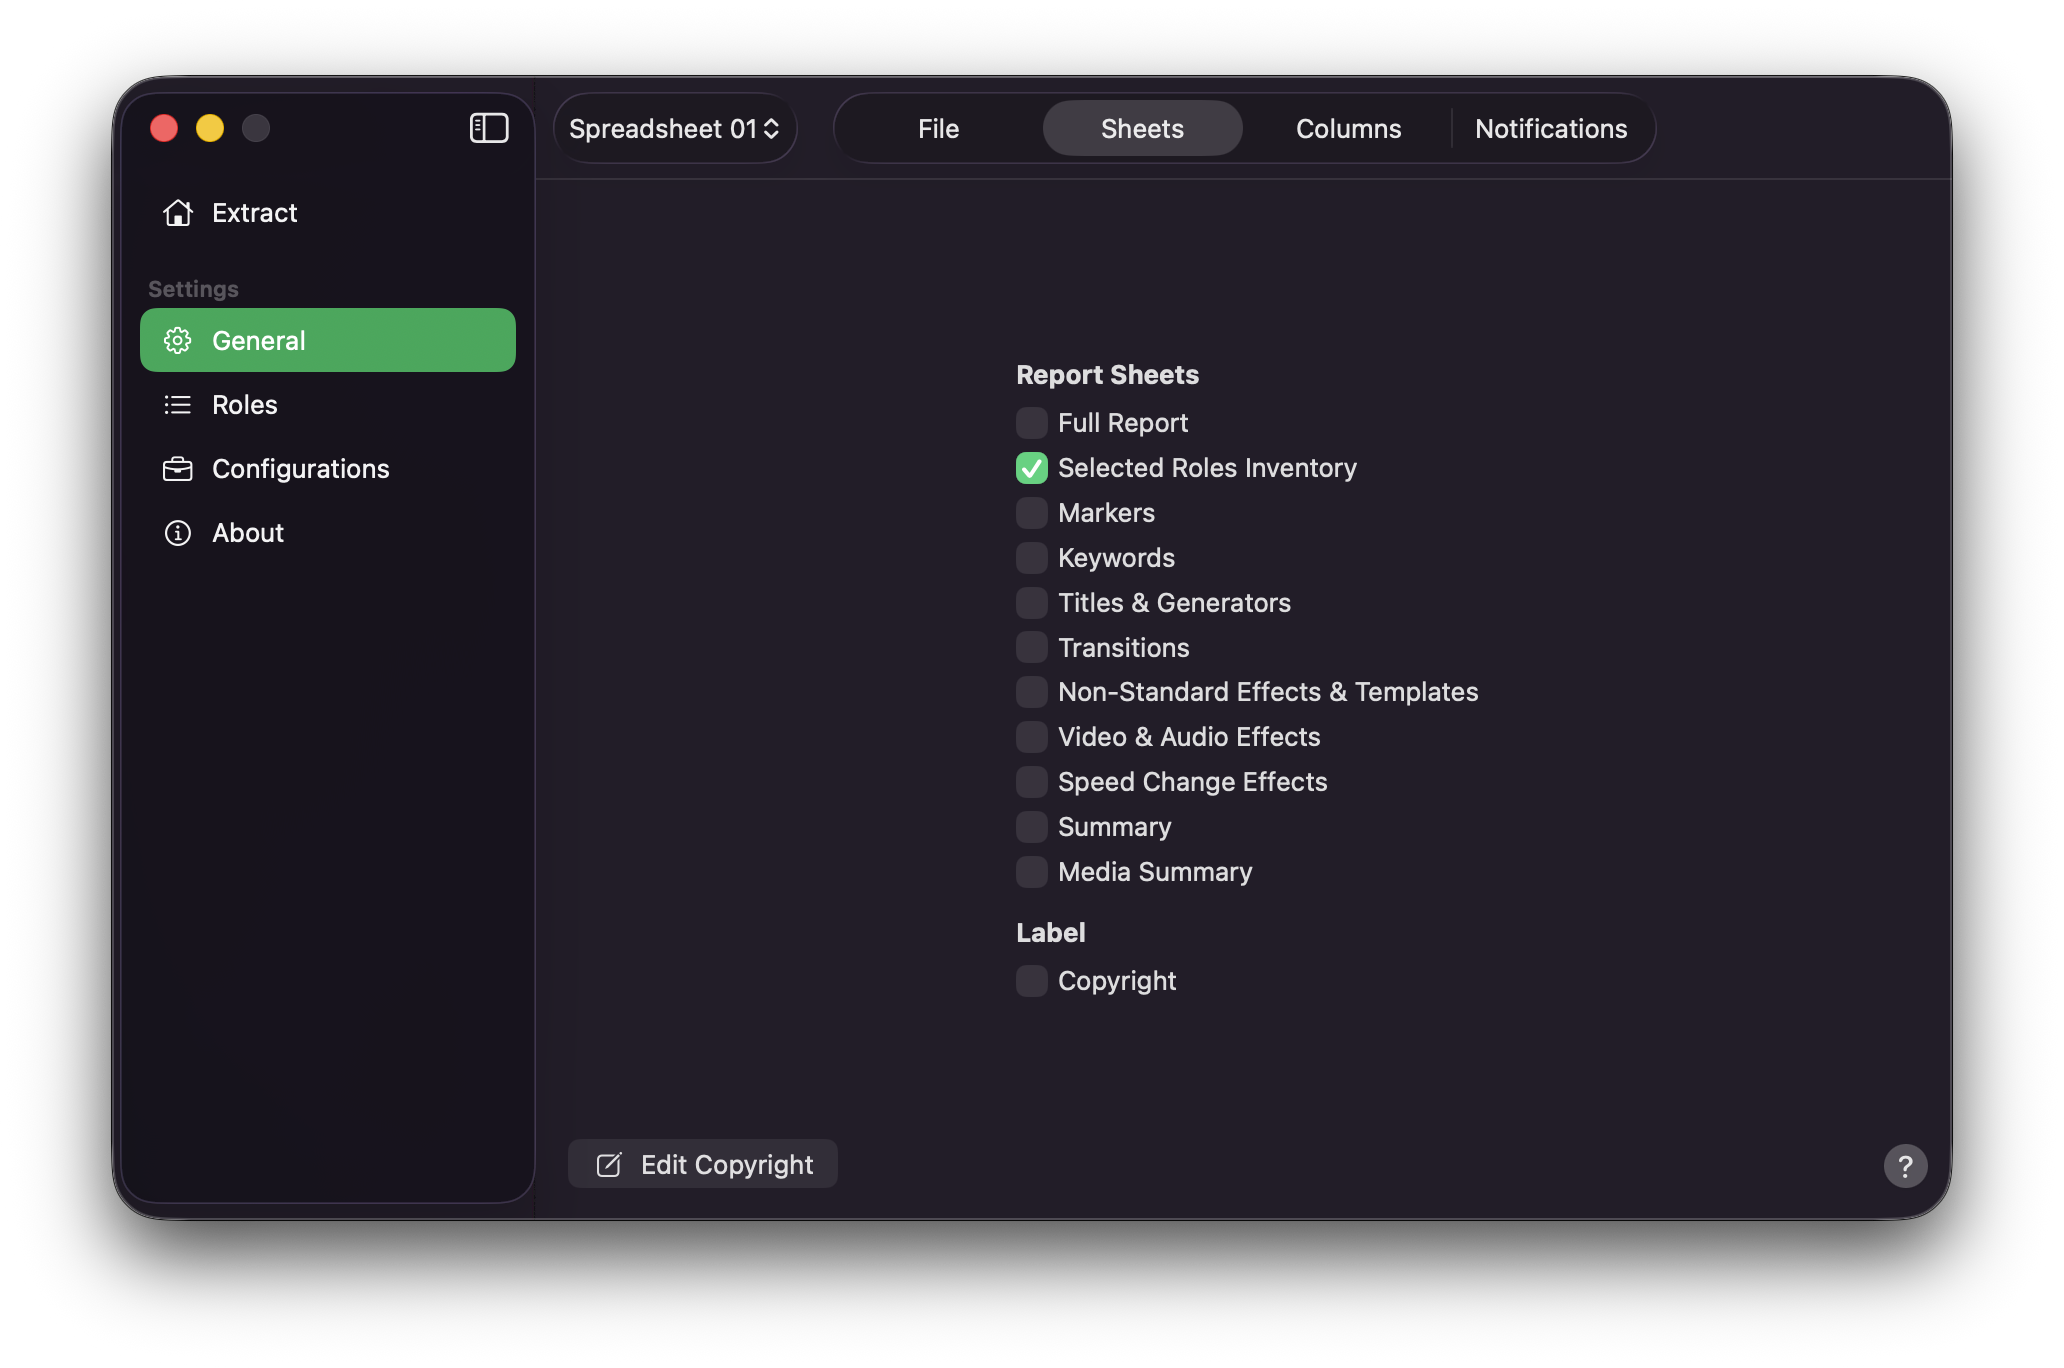
On the [Sheets](/user-guide/general/#sheets) tab, choose which worksheets appear in the Excel workbook (`.xlsx`):
- Turn on `Full Report` to enable every optional sheet at once, **or**
- Enable sheets individually — for example `Markers`, `Keywords`, `Titles & Generators`, `Summary`, or `Media Summary`
A summary of enabled sheets is also shown in the status bar on [Extract](/user-guide/extract).
### Optional Column Selection
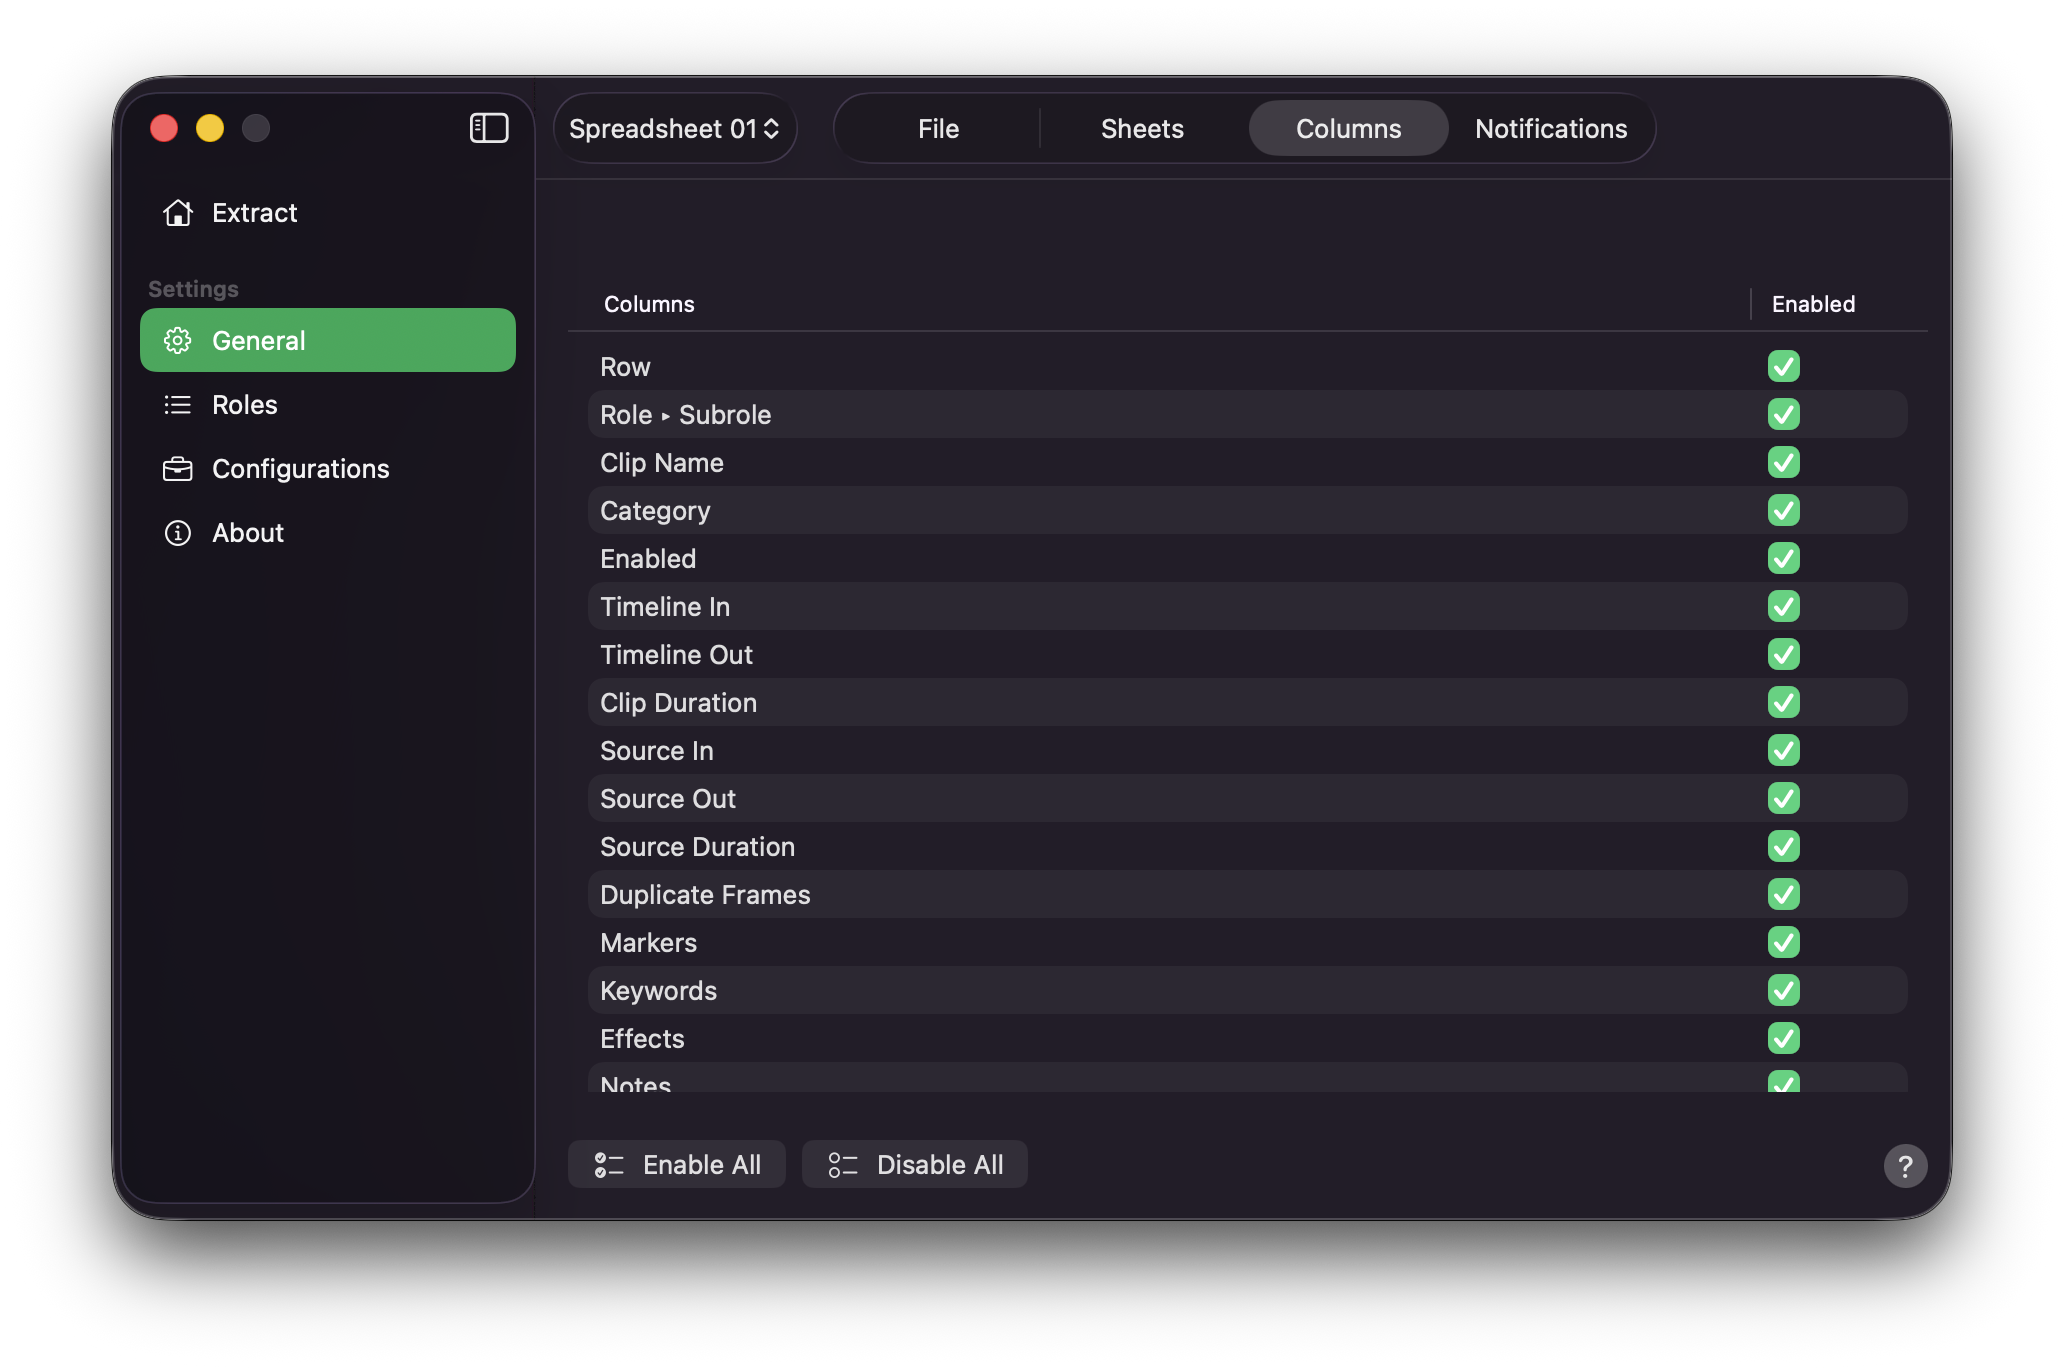
On the [Columns](/user-guide/general/#columns) tab, use the table to turn individual columns on or off. Disabled columns are omitted from the export. Press `Enable All` or `Disable All` when you need a quick reset.
The `Screenshot` column is controlled under [Export Options](/user-guide/general/#include-screenshots-in-role-inventory), not on this Columns tab.
## Final Cut Pro to Excel Spreadsheet
1. Drag and drop your `.fcpxml` or `.fcpxmld` file onto [Extract](/user-guide/extract), or drag a timeline / compound clip from Final Cut Pro.
2. **Production Data** will begin the export.
3. If `Choose Media Folder` appears, select the original media folder, the proxy folder, a Final Cut Pro library (`.fcpbundle`), or an enclosing folder, then press `Grant Access`. Cancelling this first prompt cancels that export.
4. The same `Choose Media Folder` panel may appear again for unread proxy or transcoded media — even after original media was granted. Grant the proxy folder the same way. Original and proxy media often live in different folders.
5. If remaining files still cannot be read, choose `Choose Another Folder`, `Continue Without Remaining Screenshots`, or `Cancel Export`.
6. **Production Data** will create an Excel workbook (`.xlsx`) in your Export Destination, with `Source In` frame grabs in the Role Inventory `Screenshot` column.
!!!info Info
Titles, generators, and audio-only rows leave the Screenshot cell blank. If media cannot be read after you grant access — or you continue without remaining screenshots — leftover cells stay blank. The rest of the workbook still exports. See [Include Screenshots in Role Inventory](/user-guide/general/#include-screenshots-in-role-inventory).
!!!